
How to Connect a Solar Photovoltaic System
1. Determine Your Energy Needs
Before connecting a solar photovoltaic system, it’s important to determine your energy needs. This involves calculating how much electricity your household or business consumes on a daily basis. By understanding your energy needs, you can choose the right size and type of solar photovoltaic system to meet your requirements.
2. Select the Right Components
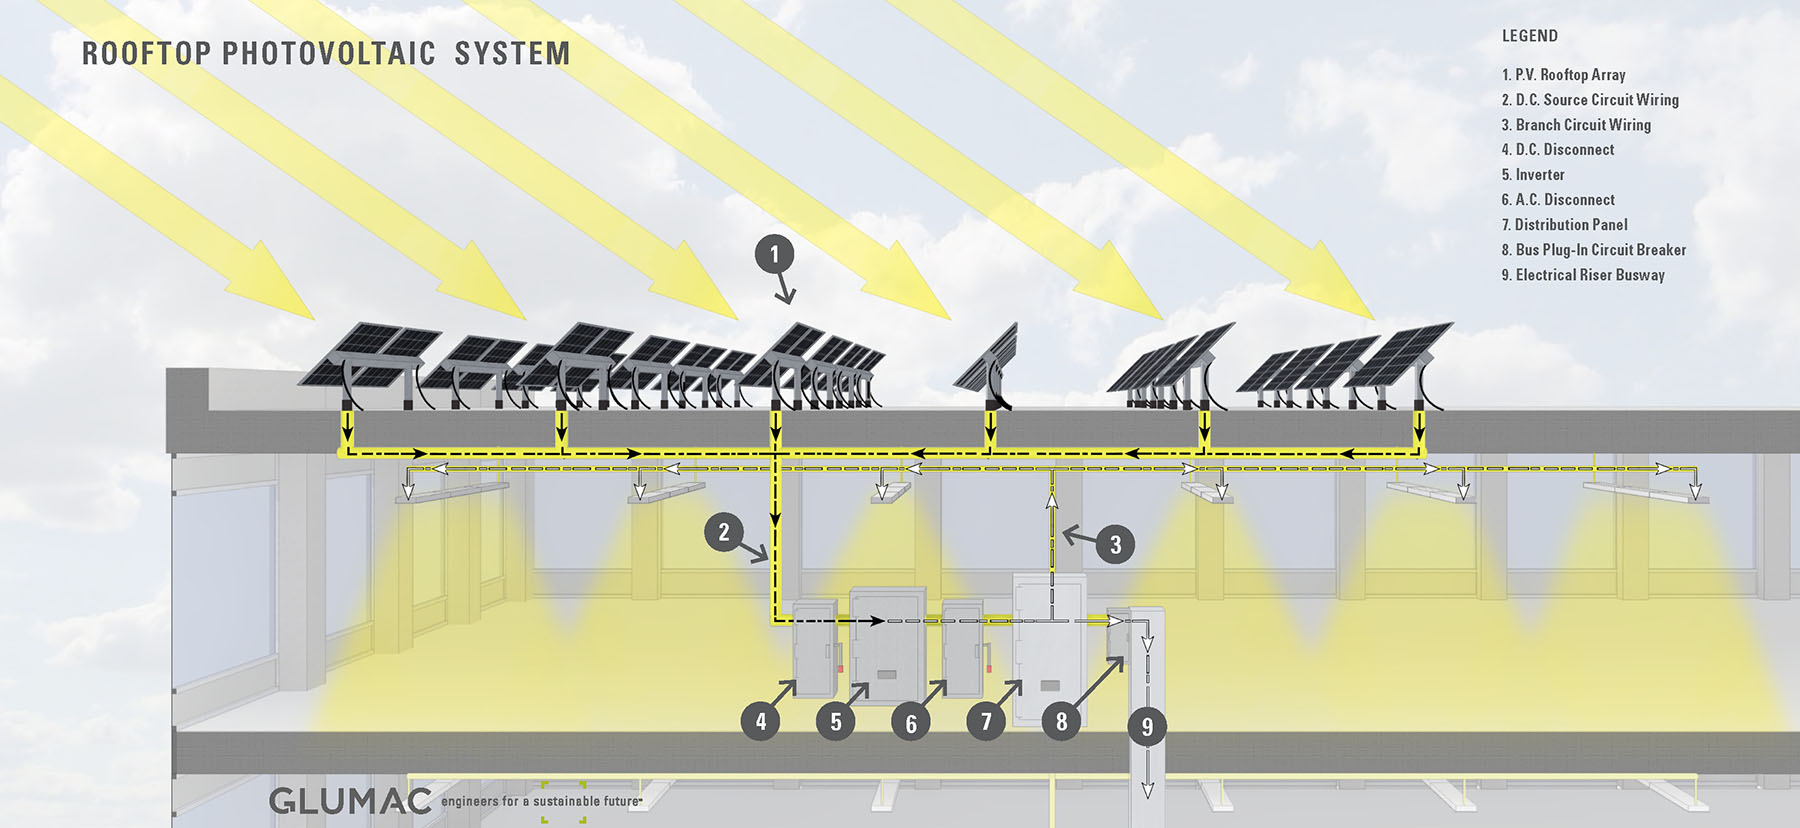
Next, you’ll need to select the right components for your solar photovoltaic system. This includes solar panels, inverters, racking, and wiring. It’s important to choose high-quality components that are compatible with each other and designed to withstand the elements.
2.1 Solar Panels
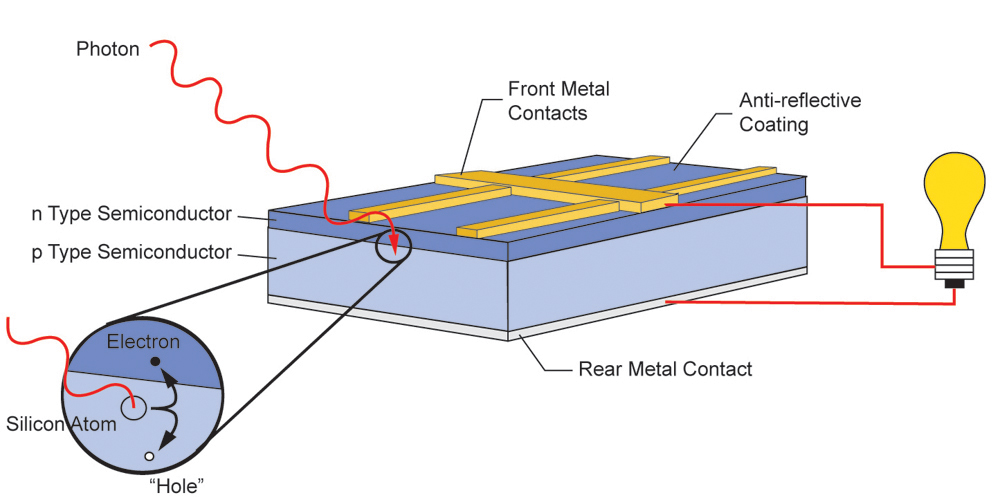
Solar panels are the most crucial component of a solar photovoltaic system. They capture sunlight and convert it into electricity. When selecting solar panels, consider factors such as efficiency, durability, and warranty.
2.2 Inverters
Inverters are responsible for converting the direct current (DC) electricity produced by the solar panels into alternating current (AC) electricity that can be used to power your home or business. There are different types of inverters, including string inverters, microinverters, and power optimizers. Each type has its advantages and disadvantages.
2.3 Racking and Mounting Systems
Racking and mounting systems are used to secure the solar panels to the roof or ground. These systems are essential for ensuring the stability and durability of the solar photovoltaic system. Consider factors such as roof type, tilt angle, and local weather conditions when choosing a racking and mounting system.
2.4 Wiring and Connectors
Wiring and connectors are used to connect the solar panels to the inverters and the rest of the electrical system. It’s important to use high-quality, weather-resistant wiring and connectors to ensure the safety and efficiency of the solar photovoltaic system.
3. Install the Solar Photovoltaic System
Once you have selected the right components for your solar photovoltaic system, it’s time to install it. This typically involves mounting the solar panels, installing the inverters, and connecting the wiring. It’s important to follow all local building codes and regulations and consider hiring a professional installer to ensure the system is installed correctly.
4. Connect the System to the Grid
If you are planning to connect your solar photovoltaic system to the grid, you will need to work with your utility company to complete the interconnection process. This involves submitting an application, obtaining the necessary permits, and ensuring that the system meets all safety and technical requirements.
4.1 Net Metering
Many utility companies offer net metering programs, which allow you to sell any excess electricity generated by your solar photovoltaic system back to the grid. This can help offset the cost of your electricity bill and make your solar investment even more financially attractive.
5. Monitor and Maintain the System
Once your solar photovoltaic system is connected and operational, it’s important to monitor and maintain it regularly. This involves checking for any issues with the components, monitoring the system’s performance, and cleaning the solar panels as needed. By keeping your system in good working condition, you can maximize its efficiency and lifespan.
Conclusion
Connecting a solar photovoltaic system involves careful planning, selecting the right components, proper installation, and ensuring compliance with local regulations. By following these steps, you can successfully connect a solar photovoltaic system and start reaping the benefits of clean, renewable solar energy.
